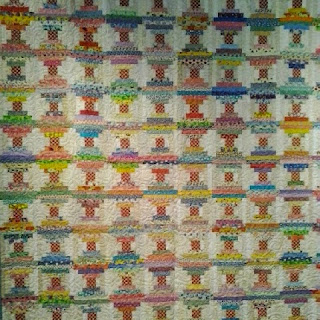
Thursday 30 April 2015

Teddy bear quilt, part 2

Back to the Bears, as I said in my earlier post, these bears are so adorable. With lots of intricate work.  This first one is another one of my favourites.  It's a mama bear with her baby bear.


We have a bear going for a balloon ride while, when one of the balloons escapes.  It is not visible yet but the border on the right is a row of small sailing boats.


Here we have a cute girl and guy bear sharing a pair of pajamas.  The classic her the top, him the bottoms. Can you see the tie string on his pajama bottoms.  I like the strips of the fabric too.


Lastly in this block we have a Christmas scene of a bear with a Santa's hat and scarf, beside a Christmas tree.

As you can see, I am not stretching the truth when I say the blocks are gorgeous.  So much detail.  A lot of these pieces are tiny.  It's stunning.

Wednesday 29 April 2015

My one and only Mariner's compass

I finished it!  I finished the mariner's compass wall hanging.  This is what I will look like hung on the wall.


This picture is on an the table where it catches the light from the window on an angle, so that you can really see the quilting.  I think it turned out nice.


I did this piece all freehand.  Now all I need to do is put on the binding and the hanging sleeve.

Sunday 26 April 2015

Santa stockings

Yesturday, the kids and I ended up at my Mom's place helping her finish putting her sewing room back together.  Friday, not last week but the week before, we went for dinner and help Mom empty all the large furniture from her sewing room.

Mom spent the following week plugging up the holes, priming, painting and steam cleaning the carpets.  She even managed to get some stuff back in herself.  But what was left was hanging the large cupboards back up.  Not a job for one person.

Yesturday, I called on my brother for help and together we put all the cupboards back up, however in a different location.  Now Mom can spend this coming week putting her sewing room back in order.

Prior to going to my Mom's and after doing all the running around, I had a chance to do some quilting.  It was Christmas in April.  I was quilting two Santa stockings for a friend, each a mirror image of each other.  They don't look big, but they are actually 2 1/2' tall and just over 1 1/2' wide.


Here is an angle view, so you can see some of the actual quilting.  For the quilting it was mostly done by outlining the forms and in the larger areas I used some large spaced fill ins.


This close up picture shows some of the fill in waves in the Santa's beard.  It also shows the outline a bit better too.  I outlined the bricks, icicles, and the shading found in the arm and leg of Santa's suit.


Two more things off my list of things to do.  Unfortunately, it does not reduce the number of the quilting projects on my own list.  

Today I am thinking to change that and try to finish quilting something small, so that I can get some progress done on my own list.  I think it will be the Mariner's compass. 

Enjoy the sunshine.

Friday 24 April 2015

Teddy bear quilt, part 1

On Wednesday I had a Quilting Bee meeting.  I shared with you some of the things that people were working on a couple of weeks ago.  Well have I got a treat for you.  One of those ladies has finished what she was working on and WOW what a quilt it turned out to be.

I am going to hold back some of the suspense and spread it out over a few posts and show the complete quilt at the very end.  I can tell you, you will not be disappointed.

The blocks are in not particular order.  This first block is of three bears sleeping.  Looks like papa bear in his cap, mama bear in her white bed cap(not sure what it is called) and baby bear all snuggled under a quilt.  The bottom border is a row of leaves and the right side is ribbon.


This one is a girl bear in a dress and matching hat sitting amongst a bunch of stars.


This block is of a boy bear wearing a jacket, sitting, leaning against a vase with flowers and talking to a cat.


The last one for today has got to be one of my favourites, which is a bear out on a rainy day in her raincoat and rain boots, under an umbrella while the leaves are falling.  I thought this was just the cutest and I love the cheerful raincoat.  The border on the top are he leaves that are below the sleeping bears and the right is ribbon.


This quilt was made my my friend Carol.  These blocks, as well as the others, are all very detailed.  Very tiny pieces.  All hand appliquéd and hand quilted.  I was overwhelmed with the whole quilt.  So much to look at.  It was amazing.  

I will leave you with that for now.  Stay tuned for the next batch tomorrow.

Thursday 23 April 2015

Another floret for my hexagon quilt is done

Another floret for my hexagon quilt is done.  I have been working little by little on these hexagons, with some interruption when I needed to get my Tiny Town appliqué block done.  Today I put the last purple hexagons on and can now move on to the next colour.


When I got home late this evening I decided I should get started on the next appliqué block for mid April.  So that I don't leave it to the last minute, I have to try and get one building done per week.  Tonight I managed to get about eighty percent of my barn done.  I will take a picture when it is complete.

While I was sewing I had QuiltCam on and enjoyed listening to Bonnie Hunter while sewing.  It just happened that I started the QuiltCam at the some time that she ran the show and it ended just in time to head to bed.

I enjoyed my relaxing night.  Time to distress.  Enjoy everyone.

Wednesday 22 April 2015

I have finally been bitten

I have finally been bitten, by the GO! That is the Aqququilt Cutter.  From previous posts you can tell that I do spend a lot of time cutting up fabric. Cutting down my scraps trying to keep a handle on the scrap basket.  Well now I have a cutting system to help.  It's called GO!

I can see the advantages of the GO!  I've read about it many times on various Blogs.  Many people use it and have many different dies.  For me, for now, I purchased the two that I would use the most.  They are the 2" strip cutter and the 1 1/2" strip cutter.  These are the two sizes of strips that I use most often when making a quilt.  But, the more I read about it the more I can see owning other dies in the future.


Gone are the days that I spend almost a full day cutting up the pieces of fabric to make a quilt.  This will get it done in a fraction of the time.  The box says 90% faster.  We'll have to see.

Here is a picture of the 2" strip die loaded with scraps to be cut and covered with the protector.


This is what I got out of it.  What I did was layer my scraps all along the die with no more the six overlaps.  It doesn't look like much but I piled the fabrics on top of each other.  Just to check it out, I took the brown floral fabric and placed it back on the die in the opposite direction and ran it through the GO! again.  Out the other end I had fourth-eight 2" squares cut in a matter of seconds, not more than a minute, for sure.  The only waste I had was the small little pile beside the squares.  No more than I would of had, had I cut them all individually.  


This is great.  It could get me into some serious trouble if I don't keep an eye on the amount of fabric I am cutting.  As my daughter said, you can cut all the fabric you want, but you still have to sew it in the end.  

Do you see the black lines on the die cutter?  Those are the lines that you can use to line up your fabric, if you want to make different shapes.  There is a 60 degree line if you want to make diamonds for an eight point star, a 30 degree line, a 90 degree line and a cross line.  The possibilities with just those lines are huge.  Makes the 2" die cutter that much more useful.  I didn't know that when I bought it, but I am very happy they thought to add these lines to the new dies.

Tuesday 21 April 2015

Working on the 3D Pinwheel quilt

On the Saturday after meeting for Tiny Town, I figured I needed some time to play a little.  I needed to relax a bit, with all the craziness going around here and work.  My daughter reminded me that I only had about 2 1/2 months to go before my second niece has her baby.

I posted a while back about getting all the fabric together, cut and ironed into prairie points.  I decided to pull the basket out and do some mindless sewing.  I managed to get all the blocks sewn up that same day.  Doesn't it look cute.  The picture was taken in the evening and my lighting is not the greatest, but I think you get the picture.

I took a picture to include the small border and the large border.  My daughter is not sold on the idea of this particular large border.  She feels it is too dark for the centre of the quilt.  I am thinking she may be right, but for now I leave it there and evaluate it each time I walk by.


This next shot is of a close up.  Here you can see more of the colours and the fabric pattern.


When I have a chance I will put the blocks together.  It won't take much time once I sit down and work on it.

As for the rest of my quilty stuff.  Not getting much done.  Working lots of overtime and managing things around the house.  It's tax season too, so have to get that stuff done.  This year I have five to do and with all this my computer decides that it is too old and won't allow for anymore upgrades.  So, now I have to learn about my new computer and when I get some time, slowly pull all my files and data from the old computer to transport it to the new one.  What a job.  Right now though I don't have the time.

You know, there is a theme going on here.  It's call time.  I need more time in a day to get everything done.  My husband and I keep telling the kids (when they complain that the didn't get to do this or that), that time does not stand still, you need to be aware of the time (ie. You sleep until noon you don't get to do as much as you want during the day, before it is time to go to sleep again).  But right now, they don't get it.

But me, I really want more time!!!  Ok, ok I will stop whining.  Talk you you when I can.

Saturday 18 April 2015

Tiny Town meeting today

Today was the meeting for Tiny Town block of the month.  I was working on my block, running out of time.  Working overtime at work didn't help.  I even came home yesturday and worked on my block from 8:00-10:30 pm.  By this time my eyes felt like grit.  This morning I woke up at 6:30 am and worked until 10:00 am, when I had to leave to go to the meeting.

As you can see, I almost finished the block before class.  The only part that is still left to do is the red car, at the bottom and the car windows.  Really, really close.


While I was at class this time I thought to take a picture for comparison.  There is not a single block that looks similar to another.  It is very nice to see all the different variations.  Some people did their blocks by machine appliqué with fusing.  Some did fussy cutting for curtain parts of the block.  The colour combinations are all unique as well.


This next group of pictures were the late comers.  Two of the late comers also brought their block number one, as they hadn't finished them for the last meeting.  Even these look so different from the previous batch.  I think it is great.

You may not be able to see it but the person who made the bottom right hand block decided to and in a clothes line with embroidered clothes hanging from the line.  In her block number two the middle block on the top row, she added a bird house and baby bird in the tree. Cute and imaginative.


Our next assignment is block number two.  Yay!!!  That is the block that I already have completely cut out.  It's a busy block, so I will need to keep on top of it.  There are four different buildings, a topiary, and a bird house.  I want to try and get ahead this time, instead of going crazy trying to finish it last minute. We shall see.

Enjoy the beautiful weather everyone!

Thursday 16 April 2015

My daughter's Easy Street quilt

I finally finished quilting and binding my daughter's quilt.  This pattern is called Easy Street, a mystery quilt designed by Bonnie Hunter.  My daughter just jumped right in and went along with the mystery.  Myself, I tend to be more cautious.  I think I have a control issue and not knowing what I am making would be hard for me, because I have no control in regards to the pattern or selections of what colours and where they would look best.  But, I am very proud of my daughter for going for it.


The next picture is the quilt on her bed.  I tried to take the quilt off her bed, so that I could get a better picture, but at first she refused.  She jumping on her bed sprawled out saying no, no, don't take my quilt.  It was quite funny watching her.  She can get very theatrical at times.  She goes on to say no, no, you can't take my Romeo away.  I had to laugh, while I struggled to push her off the bed.  

My daughter is very sentimental about this quilt because it is her first queen size adult style quilt.  I think it looks great.  She did an excellent job on this quilt.  The only difference between this quilt and the actual mystery quilt is that my daughter set her blocks straight instead of on a diagonal.  She decided to do it this way so that the chains would be on a diagonal.  I think it was a good move. 


Here is a picture of the quilting, from the back.  It is of the large main motif.  It was difficult to get a full picture and get the lighting just right, as the design is large at 12 1/2", but there is enough for you to get the gist of it.


This is a close up.  With all the colour it is more difficult to see the quilting.  That is why I took the picture above.  In this picture though you get to see the chain that goes through the green blocks that make up a sashing, but in fact that sashing is part of the second block.  Two blocks make up this quilt, set side by side to make the secondary design of a chain that make a grid across the quilt.


One more quilt that I can cross off my list.  Yah!!!

Wednesday 15 April 2015

Pin cushion

While I was on vacation a couple of weeks ago, after going to a quilt store with my quilting bee girls, I took some time to play and make a pin cushion.

This was my attempt.  I looked up a free pattern on the Internet.  This is a Dresden plate block that is sewn into a box shape with a bottom box in a different colour.  It's pretty large finishing at 6" square and 2" high.  It was fairly easy to make, until I did the centre circle.  The first circle I cut was too small, because I didn't include the seam allowance.  The second circle I thought was fine, but I misjudged the placement.  When I sewed around the circle I ended up too short to catch all the Dresden plates.


So....I took that circle off and tried again.  I had it sewn again and it looked good, until I started filling the cushion up with the ground walnut shells.  The movement and stretching caused the Dresden plates to work themselves out from underneath the centre circle.  This was frustrating, so I put it aside for a bit.

Part of my frustration was that I didn't like the colours I chose.  They were not my first choice.  I wanted something softer looking, but settled for these colours, the problem with the centre piece didn't help and lastly the pin cushion was much bigger than I thought, so I didn't have enough ground walnut shells to file the cushion.  I took this as a sign.  A sign that I should give this up.

I don't give up easy.  Instead I decided to take it as a sign that I should do this properly with the softer colours like I wanted to.  When I went to The Hobby Horse this past weekend I picked out a few coordinating fabrics for the fabric that I wanted to use in the first place, as well as some more walnut shells.

Here is what I ended up with.


I like the pastel colours for this better.  The dark green circle is the same fabric I used for the bottom and bottom half of the pin cushion.  What do you think?

Tuesday 14 April 2015

Did up a bunch of pineapple blocks

I don't have much to share today or from the past couple of days.  I have been busy with various things, but nothing quite at the finish stage, that I can show you.  On Sunday I did finish quilting and binding my daughter's Easy Street quilt, but I am waiting for daylight to take pictures.  So, that may not be until the weekend, as I am working overtime this week, again.

I will share with you the pineapple blocks that I have been working on during little bits of stolen time here and there.  I finished two blocks on Sunday while I was waiting to take my daughter to work.  I am just getting some time now today to trim them and remove the paper.


I've also been working this evening on my pincushion.  It is almost done.  I will share that with you soon.

Hang in there, soon I hope to share more with you.  Like I tell the kids, everything takes time.

Saturday 11 April 2015

Tiny Town quilt progress

These here are the pieces that I have placed on the design wall. My Tiny Town quilt is starting to take shape.  I have block number one done on the left.  Block number two is all cut out and ready to sew and block number four is also all cut out and ready to sew.  I had this much done for at least two weeks now.  


At the beginning of the week I realized that I have only two weeks left to completely sew block number four.  So I started to take this to work, to work on, during my lunch.  This is how far I got on it.


Now today is the last Saturday before the meeting at Sew Sister's quilt store and I am running out of time.  Even though I am running out of time, I am still procrastinating.  I headed out this morning with my daughter and one of the ladies from my quilting bee to The Hobby Horse.  What I got there will be for another post.

When I got home I had no more excuses.  I had to get my block done.  I worked on it all afternoon and after dinner too.  What did I get done?  Well,  I finished all the pieces of the post office including the embroidered details.  I finished the mail box and the embroidered details, plus the tree.  But, now I cannot see anymore and have to head to bed.  


Tomorrow I will have to finish the bird that I started.  That will complete the top half of block number four.  I still have to do the bottom half of block number four, which is the car and the postal truck.  All this needs to be done and sewn together with the top by the meeting at 11:30 am Saturday.

The clock is ticking.  Tick......tick......tick......will I get it done........(the theme from Jaws)......dah-dah.....dah-dah............................of coarse I will.  Even if it means I am up late on Friday.  I always get what I need done.

Thursday 9 April 2015

Quilting Bee last night

Last night I had a quilting bee meeting.  I thought I would share with you what some of the ladies were working on.  They were nice enough to let me take pictures and share their work with you.

One of the ladies, Florence or as we know her Flo, is expecting to be a first time grandmother.  She has started to make an appliqué baby quilt.  I believe she has completed a block already and is now working on block number two.  This one has alphabet tumbling blocks.  It looks cute in pastel colours.  She is also doing the hand stitching around the letters.


Another one of the ladies, Carol, is working on a full size quilt in appliqué. This one has got major detailing in the quilt.  You may not see it in the picture but all of those miniature rocking horses have an actual mane.  The rocking horses are part of the border on the right and bottom of the block and on the left there is a pieces ribbon in red.  Carol is assembling these blocks in a quilt-as-you-go method.


This next block is right below the one pictured above.  You can see a portion of the rocking horse border.  This block has the same red ribbon border along the left and a chevron border along the bottom.  These blocks are just sooooo beautiful.  All the tiny details.  I like the subtle texture changes between the head/face and the muzzle or the paws. And the quilting really make everything stand out.


Carol has been working hard on this quilt.  She has many of the blocks already done, but I didn't think to take pictures until now.  Maybe, if the ladies are willing I could take more pictures down the road, to share with you.  It is always nice to see things other people are working on.

Tuesday 7 April 2015

Fourth batch of pictures from the Etobicoke quilt show 2015

This would be the fourth and last batch of pictures from the Etobicoke Guild Quilt show 2015.  There were many gorgeous quilts at the show, I was in such ahh that some points I forgot to take the pictures.

I took the picture of this first quilt, as it reminded me of a technique I saw in one of the books I have. I want to make one, one day.  It is not really difficult and looks great.  I've seen a bunch of different colour ways and each one is pretty.  


This next one I thought was really pretty.  This quilt is all appliqué with dainty little pieces.  The quilting itself is also very beautiful.  Very detailed.


A close up of the applique block from the quilt above. Don't you just love those tiny vines, curvy leaves and the itty bitty berries.  This maker had to have had patients in spades to finish this quilt.


This last picture was taken for the stunning layout with the bear's paws blocks.  I also like the effect of the black and solids. I should have taken a picture of the whole quilt, because the paws were also framed nicely and made for a pretty quilt overall.


Monday 6 April 2015

Mini blocks log cabin quilt

Between all the productivity last week I still took some time to play.  My daughter cringes when I answer to her question, "What have you been up to?", and I answer "Playing".  She knows it means I have been up to trouble and have started yet another quilt.  She considers herself my good angle on my shoulder.  The one that try's to keep you out of trouble.  In my case accumulating too many quilts in progress.  I just can't help myself.  I like the variety.  I seem to have ADD when it comes to quilting.  Thankfully, only in quilting.

I am always trying to find a quilt to make that uses up scraps, in this case very small pieces of scraps. In this case pieces that sometimes measure just under an inch.  Aren't they sweet?  It's a mini log cabin block.  Believe it or not, I plan to make a queen size quilt with these.  Well......480 of these blocks.


Each block will finish at 3".  The individual strips finish at just under a 1/2".  I am making them by paper piece.  This way I can use all my very small scraps, without worrying about the grain of the fabric.  Below is the pattern that I made using my EQ program.  I also used the program to make up the blocks.  Six blocks fit on an 8 1/2" x 11" paper.


The only piece of fabric that did not come out of my scrap bin is the red that I am using for the centre.  The centre will be the only part the will be consistent in the whole quilt.  Otherwise I am doing a scrappy traditional log cabin block with a light side and a dark side.  Here is my little basket of parts.  To give you a reference point, the little red squares are only 1" square.  The pile of paper blocks is stacked 478 high, as I have completed two already.


These little blocks are something that I will do on and off until they are done.  There is no time line on them.  When ever I want to "play", I will do them up.  For now it has taken up residence beside my sewing machine.

PS.  I don't feel guilty starting this one, I mean I did finish one this past week, didn't I?  But please don't tell the good angle.  ☺️😉😛

Sunday 5 April 2015

Preparing the templates for my Daughter's Easy Street quilt

My daughter has been waiting patiently for me to get to quilting her quilt.  She finished it during summer break of last year 2014.  The quilt that I am quilting is her Easy Street Mystery quilt by Bonnie Hunter of Quiltville.  Thus far I completed all the in-the-ditch quilting and the chain that we consider a sashing.  

The quilt consists of two blocks set on point, but my daughter's version is not on point.  When it is not on point the one part of the block creates a diagonal chain.  We are treating this as a sashing for the quilting designs.  Check out the earlier post which shows the pictures of the quilting so far.

Now what I have left to do is the large blocks left between the sashing and the two borders.  When I have a lot of blocks to quilt or the borders, I like to make myself a template.  I use this blue plastic available in quilt stores.  The first one here is for the large block.  In this case I only cut out a quarter of the block and rotate it a quarter turn around the block to complete all four corners.  This way it is easier to manage instead of a 12.5" square.  

Notice that I also drew the lines of the block on the plastic template for easy placement.  The little white slots are the design.  I will use the pounce block with blue or white chalk to mark the design on the quilt.  This will wash away later.


My daughter has chosen to go with the Fleur-de-Lis for her quilting throughout the quilt.  This next picture is of the last border.  This pattern is from Designs For Continuous Line Quilting by Shirley Thompson.  In the space right in the corner we will quilt her name, the quilt name and the date she made the quilt.  I still have to cut this pattern out.


Lastly we have the small border.  This one measures only 1.5".  It will be tedious to cut out, but because it is small, it will be easy to quilt.


Stay tuned.  The next pictures of my daughter's Easy Street quilt, will be of the completed quilt.

Saturday 4 April 2015

Some progress on this and that

I have been on vacations this past week and have been catching up on all kinds of quilty things.  One of the things was this Mariner's compass wall hanging.  The top is done.  I can move it up the list to the quilting category.


I also finished a portion of all the Midnight Flight blocks both in blue and green.  Next step will be to attach, in 4-patch style, the chevrons that complete this block.  What you see here are all the blocks that I need to finish the quilt.  Making some good progress there.


I even started another batch of ten pineapple blocks.  Each block has four rounds of lights and five of darks.  The blocks finish at 7.5" and take about 50 to 60 minutes each to do.  The quilt requires 83 full blocks, 24 half blocks and 4 corner blocks.  I am at least 30% of the way done, maybe a bit more.


I have been doing a bit of this and a bit of that between everything.  I will save some of it for another post.  I am definitely happy with the progress.  Talk to you soon.

Friday 3 April 2015

Third batch of pictures from the Etobicoke quilt show 2015

Here is the third batch of pictures from the Etobicoke quilt show 2015.  This batch is a variety of examples of how one can use their scraps,

This first on is the simple block called courthouse steps.  The layout in this one is with all the blocks oriented in the same direction, but there are numerous layouts that you can choose from.  The fabric used was reproduction '30-'40s.  There were not many '30-'40s fabrics at this quilt show.  This type of quilt is great for using up all your small scraps.


This next quilt is one that I have done in the past, minus the small squares.  It was easy to make and was great for my precut 2" strips.  This one is done with all black fabric and little bursts of blue.  The one I did was done in a variety of blues.  I took this picture as well to remind me to make another.  This time I may choose to do it as completely scrappy with only the squares a specific colour.


I took a picture of this table runner for my mom.  She likes it a lot.  I am going to try and find the pattern for this one.  This is a paper piece project.  I like the autumn colours that were used.  I can envision this done up in Easter colours, winter blues and even summer bright floral colours.


Lastly for this batch we have an art quilt.  It is very impressive in person.  As you can see it won an award, for creativity.  Some of these blocks measured less than an inch.  This quilt would have been a test of patients to line things up just so.  This quilt is completely a scrap quilt.  One can look at this for a long time and be inspired to try some improv of there own.  I don't imagine this quilt as being a one time affair.  I feel this would have been a work in progress for quite some time as the ideas evolved over time.  With the variety of shapes and added curved tiny borders around the circles, I would have to guess that this was done by a very experiences quilter.


So there you have it for examples of scrappy quilts.  Scrappy is "in", in a big way and I don't think it is just to use up those left over pieces.  I for one enjoy scrappy much more than looking at a quilt that is all the same.  Scrappy keeps your eyes moving across a quilt trying to see everything.  It holds my interest for longer.