Sunday 29 November 2015

Started Mel's Romance & Roses quilt

I did finish the Midnight Flight quilt.  I am just waiting for some time to take the pictures with natural day light. 

The Midnight Flight quilt is for my first and eldest niece. This quilt Romance & Roses is for my second niece, the second eldest.  I plan to make my my way down trine to all my nieces and nephews in order of birth.  The only time I will divvy from that is if someone "really" likes a quilt that I made already and doesn't have a home.

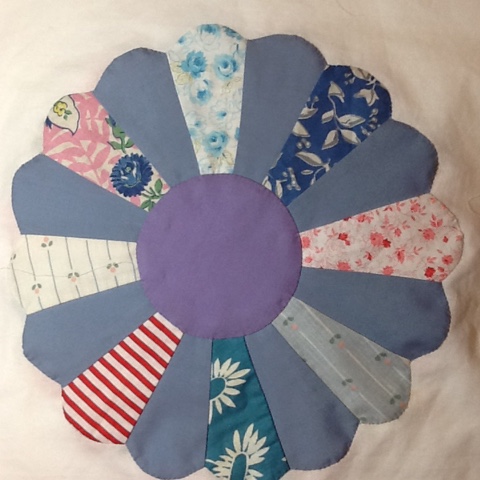
This quilt is called Romance &Roses from the book Simple Blessings by Kim Diehl.


My version of the quilt will have a different border though.  I will do the diamond borders, but I plan to change the applique to something with a bit more softer feel to it.  I think it will suit my niece's taste a bit better.  In the picture below on the left hand side is a sample of the applique border I plan to do, or close to it.


Here is what I have done so far.  Nine blocks done.  These are my nieces colours.  Her bed duvet is in a taupe colour and her apartment accessories throughout are a deep burnt red with blacks scattered about.  For the applique vine that will go around the border I will need to add in a green, but I will go with something deep, so as not to overwhelm the rest of the quilt.  


When I asked my niece to describe what she wanted in a quilt, she just said she wanted it to have a feminine feel to it.  I think this will work.

Yesturday, I was running around.  First with getting my daughter to work, my son to his hockey game, and a little later picking up daughter from work. Went out with my sister to Costco. Wow, what a place!  Good thing I do not have a membership.  One can go crazy there with all that they carry.  After that my son and I headed to the hairdressers, he was so bad we could have just put a ponytail in his hair.  Not that I have a problem with boys and long hair, but that is not what he or I wanted. Later we were off on a trip to the pet store to finally get the supplies for our new puppy that will be arriving December 20th.  Round that out with a trip to Walmart for salad fixings to go with dinner.  We finally settled down, my son and I to read for a bit at 8:40 pm.  What a day!  I almost hit my personal best with my steps yesturday.

Today we are off to visit the new puppy!  We are so excited!  The ride will be just over an hour each way.  I will be taking some hand work with me.  I will let you know how that goes.  Otherwise, today is supposed to be another very busy day for me, so I may not get anything else quilty done today.  I am still trying to finish the renos in the laundry room.  Unfortunately, this plaster is taking forever to dry with the cooler weather.

Thursday 26 November 2015

Floret number four for the left hand side Is done

Floret number four for the left hand side is done.  I am getting less time to do hand work during lunches or waiting around, but I did find bits and pieces of time to put this together.


It is really coming along.  Here is a picture of the left side of the border.  You will have to visually remove all the stuff hanging on the design wall around it.  This is almost one quarter of the way done.  The border that is, the rest of the quilt top still has a lot to go.


Not much more to this post.  I am distracted with work, family and renovations that I am doing myself.  Quilting is taking a leisure tour at this time.  I haven't even considered Christmas this year yet.  Not really in the mood for it, but I don't want to cheat the children out of it.  Less than a month left to go and not a gift purchased yet.  Usually, by this time I only have a few more things to get.  I'd better get cracking.

Wednesday 25 November 2015

Working away on the Midnight Flight quilt

I've been working away on the Midnight Flight quilt.  I have the centre done.  This was a picture of the two sections sewn together.  The third section is now attached but won't fit here on floor.  I like how it turned out.  I am almost there, and I will attach the borders.


While assembling this quilt I am also making progress on my leader/ender quilt.  See the latest stack I have accumulated?  I haven't counted recently but I figure I am over halfway done on these sixteen patch blocks.


This is all I have left of these parts.  I will move on to the pinwheel parts.  I am getting excited that I am almost done this quilt.


Do you know how easy I get distracted?  Very easy!!!  I am not even done the Midnight Flight quilt and already I have designed a smaller quilt with the leftover pieces from this quilt.  The centre of the new one measures approx. 42" x 60",  It is made up of mostly the dark blues.  I am calling it Midnight Flight Runway.  You will understand the name once you see the layout.  But.....I will keep that a surprise for another post.  

Enjoy your day everyone. 

Sunday 22 November 2015

Finished my Tiny Town quilt top

This is the original Tiny Town #2010, from Bunny Hill Designs, designed by Anne Sutton.  The quilt measures 52 X 60.  This pattern was presented as a block of the month.


This is my version of Tiny Town.  We had our class yesturday to present the last block.  While there, at Sew Sisters, I looked around for the two border fabrics.  These two fabrics spoke to me and the quilt.  Once I got home I wanted it done, so I washed the fabric.  It didn't take too long to assemble the centre of the quilt because I had the top row and the bottom row already done.  All I needed to finish it was to attach the last block to the middle row and attach the three rows together.  I ironed, cut and attached the borders.

I kept all the main elements of the original, but used my own colour way.  I am liking the quilt/wall hanging as a whole.  Not sure what I am going to do with this quilt, so it will get put away with the binding fabric, batting and backing, until I am inspired to quilt it.


Here is a close up of the border fabric I chose.  You may not be able to see it but the small inner charcoal border has slightly lighter polka dots.  I chose the charcoal instead of my first thought of black, as I felt it would blend better and not distract from the centre of the quilt.  With the last larger outer border I went with something a bit more beige and white for the same reason.  The beige border actually calms down the colours in the centre of the quilt and helps all the different backgrounds blend cohesively. 


I am so happy to say this quilt top is done!

Today I am back to trying to finish my laundry room.  I have to build a halve wall, plaster, paint and add in all the trim work.  Later I will only have to finish the cupboards and counter.

Until later.

Saturday 21 November 2015

Examples of hexagon quilts

The other day I was on google and out of curiosity typed in hexagon quilts.  The images that came up were amazing.  I am saving the images in this post for my future inspiration.  I was amazed as to the variety of patterns and styles that were out there.  Some of the images are traditional, but others look to be a persons own creation.  All of them are gorgeous.


This first layout above, I've seen numerous times, but I especially liked this person's choice in colours.  The different shades of bright colours is very affective in drawing the eye in, and the use of white and grey help to define the shapes.  Very nice modern twist on a traditional layout.


This next image above is by Linda White of Gum Valley Patch.  This I am thinking is an original design.  What you see above is the centre if a quilt.  I cannot tell how big/small these individual hexagons are but I am guessing they are very small, in order to achieve the detail in the pattern in the amount of space that is used.  Below we have the progress the Linda made on his quilt.  

WOW!!!  What can I say?  This is really stunning!  From her centre she branched out into star points with a lot of detail in each.  She continued with the hexagon shape by filing in between the star points with more hexagon design patterns.  The balance in colour and texture is amazing.  I feel there is more to this quilt, but in the images produced by Google I didn't see anything more on this one.  It could be still a work in progress.  Sometime later I want to go explore Gum Valley Patchwork to see what I can find.


In this next image I don't have the benefit of knowing who made this, but with the balance and colouring, I am thinking it may be something done by Linda from above.  Sorry that I cannot give the maker credit for this one, because I just do not know where the image comes from.  But this maker also did an excellent job with colour and balance throughout this piece.  It, like the centre above, starts out with the hexagon shape to create the quilt, but has a completely different look and the colours are a bit more settle creating a softer feel.  If I am guessing correctly the reds on the corners of each hexagon is the starting of a star that will be extended into another border.  This is a great job and one day I would love to find the image of the rest of this quilt.


We move on to another image of a floret quilt.  This one starts with a medallion type star in the centre.  Based on the size of the quilt I am guessing the hexagons on this one are larger than all the quilts above.  Not too big mind you.  It's hard to tell exactly, but I am thinking that this is still in the thinking stages.  It is hard to tell from the image, but I feel he star is the only part that is complete and the maker is still trying to workout the layout.  The florets seem to be done too, but the cream coloured hexagons do not appear to be attached.  I think this will look lovely when it is done.


This next one is a design by Grit's Life.  I feel this one is also an original design.  This person is designing the quilt mainly with florets.  They started it with a round type theme and are working outward adding different shapes, surrounded by florets again.  Very nice effect and a nice use of the dark navy colour to define the spaces.  I am wondering how this person plans to square off the quilt.  These hexagons are also small. If you consider that most ceramic floor tiles are 13" X 13", that would make these hexagons approximately 1" across.  That would make for a lot of hexagons to make up a queen/king size quilt.  Gorgeous work.


This has turned out to be a very long post and that is not all the hexagon images that I have.  They will have to be on another post.  I am hoping this post will actually post and not cut out part of it.  Stay tuned for another day to continue with all the hexagon quilt inspiration.

Friday 20 November 2015

Floret number three for the left side

I am still working on my laundry room, so no quilting for me again today.  I didn't even get to sneak any time in yesturday, but today will be an early work day, as I am going to my mom's for dinner.  Always nice having dinner made for you.  And moms usually cater to your favourite dishes.  At least I will have that to look forward to.  Let's see if I can finish the bulk of the work today.

Sometime last week I worked on this.  Floret number three for the left side is now done.  I have been working away at these, alternating between doing the florets and doing the Dresden plates.  Now that work has changed to only half hour lunches, I am not getting any handwork done at that time.  Overall there has been less time spent waiting around too.  So, I find myself making time to work on these.


Whether it be the Dresden plate or the hexagons, I enjoy doing a bit right after getting home from work.  It helps me to settle down and relax.  I only need about an hour, to feel rejuvenated and ready to do what needs to be done.  This is usually the only time during the week that I get to myself.  It's when the kids are still doing homework and just before having to make dinner.  Me time is important, for both me and my family.  If I feel good, everything runs better and my family is happy.

I strongly suggest that everyone carve a bit of time out of each day just for themselves, even if it is only 10-15 minutes.  Everyone benefits from some zoning out time.  Time to reflect without any electronics.

Enjoy the day!

Thursday 19 November 2015

A blue Dresden plate block done

I've had the chance this past week to work on a lot of different things.  I did some major sewing on the machine and I did some handwork too.  For one, I finished this blue Dresden plate block.


I have the day off today, however with the list of things I have to do, most of them renovations, I probably will not get any quilting done.  I have to keep this post short, so that I can get started with the work, but I will try to sneak some quilting in, in the evening.

Monday 16 November 2015

Monkey wrench blocks

I tell you, my friends have created a monster.  One of my friends, Carol,  from our Quilting Bee group gave me some of her scraps in strips.  They were all in bundles by size from as small as 1 1/2" to 2 3/4" wide by various sizes in lengths.

A few days ago I sorted these strips by colour to consider what I was going to do with them.  Some of the very small lengths went to the miniature log cabin blocks I was working on and some of them went into making these monkey wrench blocks (also known as churn dish amongst other names).

I feel these monkey wrench blocks have taken the place of the spools blocks.  Does everyone remember them.  Each spool used a dark and a light fabric and each fabric was used only once in the entire queen sized quilt.  Well, these are starting out that way. 

I had only one block done for the longest time, because I wasn't going to start this quilt yet.  Really, it's the truth.  I was content to just look at the one block on the wall, admire it and dream of what the quilt will become at some future date.  But with all this variety of fabric and small usable sizes, sitting in front of me on my cutting board, really how could I resist.  It would take me longer to organize the fabrics, put them away and at some future date, take them out and start cutting up the fabric, to just cut what I needed now while I organized to put away.


Ok, so that is my excuse, and I am sticking to it.  I just like to go with the flow.  Whenever inspiration hits, I go with it.  I seem to get a lot more done that way and I enjoy the process along the way.  I will just blame it on Carol this time, for giving me her scraps.  I am sure it would please her to know they are being used up.


Each block will have it's own coordinating fabrics, but aside from that they will be individual from each other.  Some will look very traditional in their colour way and others will be more spunky.  Some will be subtle and others will be loud.  The variety is what will make the quilt interesting.


I am having so much fun playing with these blocks.  While I was assembling the Midnight Flight quilt I was using these pieces as leader/enders along with the sixteen patch blocks.  They are very easy to assemble.


As you can see below I added another four monkey wrench blocks to my design wall.  This is all the pre-cut pieces I had at the time.  In the picture you can also see the three new added miniature log cabin blocks that I made recently.  You can see the layout of the block starting to take shape.


This little corner/section of the design wall is only about two feet square and just in this section alone we get a glimpse of seven different quilts.  Two are my daughter's and the rest are mine.  If you were to see my full design wall you may think it looked like a mess, but there is some rhyme and reason behind  the whole placement of projects.

I may go through that with you at another time, but in short the Midnight Flight quilt top, that you see at the top left hand side of the picture, is getting so big that it is taking over the design wall and covering everything in its wake.  By the time it is done the whole left hand side will be swallowed up.

Sunday 15 November 2015

Mini log cabin blocks

When I got started on Saturday, after a bit of a sleep in and getting treated to tea in bed, I came into my quilt room to work on a couple more miniature log cabin blocks.  These things are so cute.  The size alone makes me smile. Each fabric which makes up the individual logs is just under 1/2" wide when complete. 


In this quilt, there will not be a block alike.  I use up all my scraps.  I will take a piece out of the basket, cut a piece the size I need and in another block I will cut another piece from this same fabric, until the fabric is all used up.  Anything goes in this block, so long as the fabric is either light or dark, to go on their respective sides.

I was going to try and complete twelve of these small blocks to make up a full block of 4 X 4 blocks. The sixteen blocks together make the full block and all the full blocks have the same layout.  But in the end I managed to get two of them done before I was interrupted to do some running around.  By the time I got back home, I decided that I needed to put these away and get to work on the stuff I was supposed to be working on, like the Midnight Flight quilt.

I got quite a lot of that quilt done before I had to break to make dinner.  I will save at for another post.

Enjoy your day, everyone!

Saturday 14 November 2015

A green Dresden plate done and sneaking in a little something else

On Thursday night after my late night at work, I needed some down time.  So, I sat peacefully in my guest room/den to do some handwork.  This is where I do most of my handwork.  I have a wingback chair in a corner beside the sliding doors that looks out into one section of the back gardens.  I have a half side table on one side which holds my work and a very old wooden chest on the other side that holds a hot cup of tea and any supplies I need for the task at hand.  It works for me.

Thursday I didn't see much out the sliding doors, now that it gets darker much sooner, but this morning the sun is streaming in.  Not enough to interfere with what I am doing, but just enough to brighten up my spirits.

While relaxing on Thursday, I managed to finish another Dresden plate block.  As you can see, this one is green.  I believe this is the first green block I've done thus far.  The picture has somewhat of a shadow on the right hand side, due to it being late at night and the angle of my lighting.


Last night, Friday, when I got home and took care of everything, fed the kids, cleaned up, etc.  I took out my florets.  I did some work on them.  Not quite done one yet, but getting there.  Later after taking some time to get my steps in, I just didn't feel like heading to bed.  It was 10:00 pm at night and I still had some energy that I had to use up, otherwise I wouldn't fall asleep.

I walked around in my quilt room looking at things.  One thought pattern lead to another, which lead to me taking out my miscellaneous shaped scrape basket.  I love playing with scraps, as most of you probably know by now.  Just petting the fabric gets my juices flowing.


Once my juices started flowing, they led to this.  I took out the miniature log cabin blocks.  When ever I have a very small scrap that one would think is too small to do anything with, I put it aside for this quilt.  This block uses up material that is as small as 1" square to as big as 1" X 3 1/2".


When the pieces get to this small, I don't trim them to size.  I just use the pieces as they are and do paper piecing.  This is one of those quilts that will take me a long time to do, because I do not work on it continually.  I will do a few blocks here and a few blocks there, but eventually I will have enough for a full queen size quilt.


In this block I was able to use some small pieces my friend Carol and Sharon gave me at our last Quilt Bee meeting.  I think there are only five pieces in this block that are my own.  The rest come from them.  Carol says she has more than she can use in her lifetime and Sharon refuses to use these very tiny pieces.  All the better for me.  I am in my glory when I am working with these pieces.  Thank you girls.  I am sure your ears were ringing as my thoughts were on both of you last night.

By the time I finished this block it was 11:00 pm, and I was now ready for bed.  But....I didn't put my scrapes away yet, because I am thinking I would like to work with them some more.  I will be in my quilt room if anyone is looking for me.

Friday 13 November 2015

Quilted my Mom's quilt

My mom has made a quilt for her eldest niece's son.  This is one of three she made with the bear embroidery, but in different colours.  That way each child knows which quilt is theirs.  This one as you can see is in green.


Aren't these the cites bears.  Each bear is different.  I did a stippling in the back ground to help the embroidery pop up.


Here is a view of what I quilted in the border.  Each quilt that I quilted for my mom has a different quilted motif for the border and sashing.


This is the picture of the whole quilt after I trimmed it.  They are all cute little quilts that the kids treasure.  They drag them around the house or snuggle up with them, it doesn't matter, you can tell that they like them a lot.  


This one was made as a part of a Christmas gift from my mom.  I gave my mom a lot of time to get the binding on and a tag if she wants.

Thursday 12 November 2015

Floret number one for the left hand side

I can say that I have yet another floret done.  This one seemed to go quickly.  This floret is number one for the left hand side.


Unfortunately, when I went to put it up on the design wall I realized that it didn't fit.  I forgot that the top right hand purple hexagon should not be there. That is where the top border intersects the left hand border.  So....needless to say I had to take it off.  Oh, well.  One little oops.  One that was easy enough to fix.

Sorry about the photo background.  I didn't notice until later, that you can see the Dresden plate block through the background.  I was working on them too.

Wednesday 11 November 2015

Another Dresden plate block done

I have another Dresden plate block done.  Now that I have completed the applique of the Tiny Town quilt, I can get back to the things that have been putting aside.

These Dresden plate pieces belong to my cousin and her husband.  They've indicated that the pieces were made by his mother.  All the wedges of the Dresden plates were assembled and the seam was tucked under with a baste stitch, ready to be appliquéd to a background.  There was no pattern with the pieces to give a clue as to how the maker was going to make the quilt, so we will be going with something simple with a bit of elegance. Something that would have been made in that time period.


This is a peach Dresden plate.  There are six different colours altogether.  For the quilt  there will be a total of twenty-five blocks.  I now have seven blocks done, which leaves eighteen left to go.  I am almost a third of the way done.  These go together nicely.

Tuesday 10 November 2015

Finished Tiny Town block number five

I finished Tiny Town block number five. Yaaaaaaahhhhhhhh!!!!!  That means I also finished the whole centre of the Tiny Town quilt. Yaaaaaaahhhhhhh, again!!!!!  I am sooooo happy this is finally done.  Our class meeting for this quilt is on November 21st, and I can now say I am caught up.  This next meeting we will be talking about borders.  The quilt top will be expected to be completed by Decembers meeting.


Above you see a close up of the top half of block number five that I finished on Sunday.  Below is a picture of the full block.  I even attached this block to block number four.  Now I need to wait until next class on November 21st to show and share the final block number six, and I can attach block number six to the main unit and call it complete until I get the borders.


I am looking forward to moving this quilt up my list from the "to be assembled" category to the "to be quilted" category.  When it gets to that category it will have to wait in line.  I have a quilt to quilt for my mom to gift at Christmas to do.  I have my daughter's quilt to quilt that she has been waiting patiently for.  She'd like to be able to use it this Winter.  I have my cousin's vintage diamond hexagon quilt to do, now that I have an idea what I want to do with it (I'm thinking a version of quilted feathers).  After all this, I will be able to move on to my own quilts.

That is, unless Sharon has her two twin quilts ready to be quilted.  Mine will sit for a bit longer. That's ok though.  The ones I have to quilt are really just sitting there waiting, because I haven't figured out who they are for and some I am still not sure how I want to quilt them.  I am not in any rush with mine.  Unless they have a purpose, they are ok to sit in this section for a while.

Monday 9 November 2015

Midnight Flight progress

On Saturday I procrastinated doing the applique for Tiny Town.  Surprise, surprise.....NOT!!!  I am so tired of this applique that I am not surprised that I procrastinated yet again.  BUT..........I was very productive this time while I was procrastinating that I really don't feel guilty. 

Instead of the applique, I spend the day on the sewing machine.  I got all of the pieces paired up and sewn into group with top pieces attached to bottom pieces.  Everything here lined up nicely ironed waiting for the next step.


After lunch I started sewing all the sections together.  This part took me a fair amount of time to do.  I ironed them all open.  At this point ALL the small sub blocks are done.  Here they are all lined up.  I am so glad that I got this much done.  This quilt was started back in August/2014, for my eldest niece.  But with one thing to another it kept getting delayed.  I am so happy to start seeing some progress on this quilt.


After dinner I wanted to do some more, but by this time my eyes are tied and it becomes difficult to do any sewing.  So, I contented myself with sorting out the sub blocks into the finished blocks.  My goal here is to sort out the colours enough that like fabrics are not touching like fabrics in the finished product.  

Sounds easy enough, but you would be surprised how much shifting of blocks is done at this stage, while making sure you still have the blocks in the right orientation to be sewn.  Good thing I had a lot of variety within each colour.


Next opportunity I get I will be sewing these up and getting them on my design wall.  I can't wait!!!

Sunday 8 November 2015

Quilt Junction quilt store

Back in October when my mother, my daughter and I went to The Quilting Bee in Fonthill, we also ran across to Quilt Junction in Waterford.  This is the converted train station.  Quilt Junction is another nice store to visit.  Last summer they were in a US quilting magazine.  I think it was the Better Homes and Gardens Special Interest magazine called Quilt Sampler.


They have lots of samplers, fabrics and even wool.  The store consists of the three rooms across the length of the converted station.  One being the classroom, the second holds a large amount of fabric, the wool, and cash register and the third has a lot more fabric, this being mostly kids fabric, and all the books, patterns and the cutting table.

In the magazine spread the store was boasted for having a large amount of mini quilt samples.  They didn't disappoint this time either.  This picture only captures a couple, but this section displayed others.  This section was a little cubby corner sandwich between shelves of fabric.


If you are looking to pass a leisurely weekend, Waterford could hit the mark with this pretty quilt store.  Once you're done there, there are a couple of antique stores across the road.  You can go sit by the river in front of the quilt store and have a nice picnic lunch before heading back out.  Or you could visit one of the featured restaurants mentioned in the magazine.

While I was there a quilt was born in my head.  I have decided to make a quilt for my sister.  I picked up a GO! Apple core cutter while I was at The Quilting Bee earlier that day.  While we walked around this place I saw the colour combination that I wanted to do. 


My sister likes blues.  For Christmas her living room is done up in snowmen and her colour theme is white, silver and blue.  Her furniture and accessories are dark chocolate brown.  So....when I saw that they had a sale bin with lots of chocolate brown and blues, I just could not resist.  I picked up some small pieces of fabric and a new quilt is started.


I think I will also add in some of these fabrics from my stash and later I will need to look for some darker, deeper chocolate brown to round off the colours. 


This quilt will be so much fun!  The pieces are approx. 6" X 4", so this quilt should also go together fairly quickly. 

Wait until you see it!!!

Friday 6 November 2015

Snowmen A to Zzzz.... letters A

My daughter finished the letter A for the Snowmen A to Zzzz.....  quilt.  This is the largest block there is.  This one is the width of three.


This block has a couple of different stitches that the others do not have.  The halo is done with the chain or cable stitch.  It looks pretty and helps the halo stand out more.


The stars are also different.  They are done using the French knot to fill in the whole star.  It also stands out nicely.  These snowflakes like the others also uses French knots to highlight them.


This will be the last block for a little while.  She still works on them, but not as often as before.  She usually does her hand work while she is watching reruns.

I'm hoping that I will finally finish my block for the Tiny Town quilt this weekend.  On Thursday, as I started late, I worked on my Midnight Flight quilt.  I got three sets sewn up.  A set is ten blue and ten green blocks.  Now they are attached together and I only need to make the last sewing to complete the block.  Also, while making the Midnight Flight blocks, I naturally made some more leader/ender blocks.  I have four more sixteen patch blocks completed.

Tomorrow, I am going to just continue to plug away at them.  Eventually they will be done.  On Thursday I could have worked on Tiny Town, but I had an itch to sew on the machine.  It had been a while.

Tuesday 3 November 2015

Snowmen A to Zzzz.... letters S

My daughter's Snowmen A to Zzzz.... letter S is done.  S is for snowman, snowflakes, scarf and smile.  This is one of her favourite blocks.  It is pretty, but I think it also has something to do with the letter S for Sabryna, my daughter.


I personally love the snowflakes.  They are all different and detailed.  Wow, I am impressed with all of my daughter's tiny stitches.  To give you a reference point, this particular snowflake is only 2" across.  She did a great job on this block.  It's beautiful.


Here is another close up of a snowflake.  This one only measures 1" across.  In one stick that goes from the one side of the snowflake to the other side, there are over 16 stitches.  This girl is crazy fanatic with her tiny stitches.  In this picture you can even see the tiny stitches on the snowman's mitten at the top left hand side.  Crazy I tell you.


As for me, I did do the topiary on the Tiny Town block number six top half.  I haven't touched it these last couple of days though.  I figure with the two Adirondack chairs and a little bumbo bee, I should be able to get it done fairly quickly and still have time to play in my quilting room/studio.