Saturday 28 April 2018

French Braid Star quilt

Last weekend my Guild had a workshop.  We had a guess speaker in a few meetings back.  She belongs to a group that makes scrappy quilts.  As there was an interest at the guild, to make a scrappy quilt, to use up stash, the speaker agreed to run a workshop for any of the quilts that she had.  

In the end there was more interest in the French Braid Star quilt.  There were many options available, but I was glad to know that this one won out.  We had a great time.  A lot of like minded people getting together to be creative.  The comradery was a blast.  Everyone had a good time.

For me, I raided my solids stash.  I've truly had these fat quarters in my stash for at least eight years, but I believe closer to ten years would be more accurate.  A quilt shop in my area used to send out four fat quarters to a theme of the month.  I did this for almost two year, so you can imagine the amount of solids I had amassed.  For this quilt I used 55 different colours (two strips each).  I didn't use any of my blacks, greys, browns or any really light colours.  The only thing I needed to buy was three meters of the Iron Grey background fabric.


What do you think?  I am liking it!  It has a modern look to it. Very different than my usual choices.  We were to have all the cutting done prior to the workshop.  I had all my colours set up in a rainbow fan.  I wanted this quilt to be random, so I picked the first colour, sewed it on to the first base square and repeated the process for the next colour and so on until I had a strip on each thirty-six base squares.  Wherever I left off, I started back on the first base square and added the next strip.

By the time the workshop was over, I had five strips, out of the six, attached to the base square.  Everyone else though were making a few blocks at a time.  So it appeared that they were so much further than I was.  I finished the four blocks above after the workshop, at my mom's place.

Here I have a picture of one of the ladies' squares.  She chose to use everything from her stash too.  She had the solid brown fabric yardage and pulled from her beiges and turquoise blue stash.  This is going to look so good.  I mature and elegant looking quilt.


There was another lady that pulled her background fabrics from her stash, and chose coordinating colours.  She also decided to do a slightly different variation of the French Braid Star quilt.  Her blocks include a cornerstone between rows of strips and in her case she also coordinated the placement of each strip, so that the blocks are all the same.  She wanted a more organized look.  It looks striking!


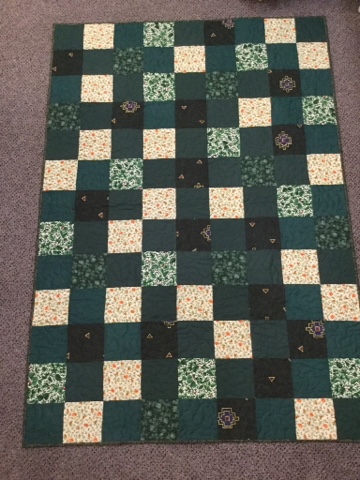
There were many others.  Each one was completely different from the next.  The variety was amazing and each one looked as striking as the other.  The examples above were all using a theme, but some of the others were completely scrappy.  A couple of the ladies had to leave early, so I didn't get a sample of the truly scrappy blocks, but they looked great.

I hope everyone brings them in when they are done.  I really want to see the finished quilt!

Saturday 21 April 2018

More progress on the Farmer's Wife quilt

The last time I wrote about this quilt was on the 16th.  We are now five days later and I am seeing some progress.  At that time I basically only had the one row completed.  Since, I've made up a bunch of the scrappy strips units that make up the corners of the main blocks.  Kind of creating a frame around each one.

Slowly but surely, the white of the design wall is disappearing.  I counted them last night while I sat there taking stock of my progress and found out that I only need to make 32 more scrappy squares.  Each scrappy square starts with a 5 1/2" square foundation that once complete, gets cut down the middle horizontally through the middle strip.


I am really getting there!  I feel there is a real chance of me having this done for the end of the month, or at least the top done.  This quilt is part of the American Patchwork & Quilting UFO challenge.  If I get this top done, that would be a 50% success rate.  If I were talking to my children about their school marks, that would not be good at all, but since this is only quilting, I am giving myself a break. Lol.  Even the other 50% saw some progress, so I am happy.

Today I am off to a quilt workshop with folks from my Guild.  It's an all day thing.  Looking forward to it.  Not like I need to make yet another quilt, but hey........  A least this one looks easy and I am using up my stash.  I'll post about it later.

Thursday 19 April 2018

Finished quilting some of the NICU quilts

These are the first two NICU quilts.  I am using these quilts to practice different designs.  I am trying to improve my rhythm, flow and coordination.

For this first quilt, I quilted continuous curves in the light squares.  When I first started quilting, I used to use rulers to do this design.  They always turn out perfect, however "perfect" is not required and it takes more time to do.  I am getting better at doing them freehand.  I'd go so far as saying that they are "good enough" for a real quilt.  The only tricky part is remembering that I am doing a continuous curve design and not the Terry twist design......lol.  I love the Terry twist design and the movement it creates.


For the dark squares, I did a new to me design.  It's called a curly bracket.  You'd find it on your keyboard above the square bracket.  It's the one with a curve that goes out into a point, and back again.  
This one is a bit tricky to get correct consistently.  So long as I am concentrating on the motion, I do good.  I recite to myself curl out/dip in/point out/dip in/curl back in, all in a small 2" space.  If I loose concentration, they start to look like just a point outward.  I'll be honest, there were more than a few that looked more like outward points.......lol.  Overall, I really like this new design for a grid.  I will have to practice this one more, so that it becomes second nature to me.

Lastly, on the border I tried a freehand vine.  I marked my quilt with a 2" grid stencil and chalk pounce pad to section off the border.  The middle line was my guide for the stem of the vine and the 2" long squares on either side, were to make my leaves consistent within the space.  The leaves are not all the same size or shape, but that is ok.  

While making the leaves, I was trying out different movements.  I found that I work better if I start the first leaf by doing the over motion, to curve up the top of the leaf, and finish it coming down the bottom of it.  I tried up/down, down/up, right/left, left/right.  Everyone has there own method which creates their own rhythm.  By the end, I think I found what works best for me.  I am going to work on this simple leaf design again and next time I will only use the one method to practice consistency. 

Progress, progress, progress.  All is good.


For this quilt of different coloured squares, I had a pantograph design I wanted to do.  It is a simple design that came with the Quilt Path system called knobs.  I overlapped the design and changed the size of it, compared to the first one I did.  It's ok, but I do prefer the skinner/longer version of my first attempt at this design.  So, I did learn something on this one too.

I've enjoyed quilting and practicing on these small quilts.  Wait until you see the next two.

Wednesday 18 April 2018

A couple of NICU quilts

Last month at the Guild meeting, I picked up a full freezer bag of blue miscellaneous blocks and pieces of 2 1/2" squares for $5.00.  The large size freezer bag was really packed in.  I sorted out the bag with different piles of blocks and took stock of what I had.

One pile contained four blocks with nine squares in the centre using light blues, surrounded by dark blue squares, making each square 10" finished.  I put them together in a four patch layout and added a border to make a NICU quilt.  These sizes are great for practicing.  In this case the size of the blocks are also great for any number of grid patterns/designs.  It's a simple quilt, but doesn't look too bad.
  

In another pile I had strips of three across squares sewn together.  This pile also had different colours and single stirps of squares too.  I had enough to make another NICU quilt.  I guess I am going to be practicing different grid patterns/designs.  I don't mind, because I like the neatness of grid designs.


I still have a large pile of blocks and squares.  I will have to get busy.  I wonder just how many quilts I will get out of this bag?  I enjoy playing with other people's scraps and helping them finish up their UFOs. 

It's funny how at is, as I do not have a lack of my own UFOs, but I get more excited working on other people's UFOs instead....lol.

Tuesday 17 April 2018

Block 4 for the 3 Way BOM Adventure

Today I had to go into the office to work and meetings, so when I got home I figured I had to take care of the water logged snow/ice in the driveway from the weekend and Monday's dump.  Wow, was that snow ever heavy.  I certainly got my workout tonight and I got two days worth of steps in too.

When I came in I was exhausted and needed to sit for a bit to catch my breath before starting dinner.  So, I sat down at my machine and pieces the blocks for the 3 Way BOM Adventure.  This is April's block, which is block number 4.  This first block here is my traditional block version. 


There is the freehand block.  This chain really stands out against the white with grey polka-dots.


Lastly, we have the modern block.  These dogs look kind of funky.  This quilt will be a playful looking quilt.  I also like the solids mixed in with a patterned fabric.


I am liking these blocks, all of them, even the other blocks I've made so far.  I can't wait to put them all together.  By the end of the year I will have three complete quilts, all the same but different.  Wait until you see all the quilting designs Tracey has planned for these blocks.  Each quilt will be quilted differently and the designs are so varied, they are as different as the above blocks are to each other.

I'm getting excited!  I have to start practicing the quilting designs on scraps before the end of the year.  I want the quilts to look half decent and some of the quilting designs are outside of my comfort zone, but that is why I am doing this.  I want to continue to learn and progress to the next level of quilting.

Thank you Tracey.

Monday 16 April 2018

Still plugging away on my Farmer's Wife quilt

So......after a bit of coaxing.....that is me hyping myself up to continue with the Farmer's Wife quilt, I managed to get some more scrappy blocks done.  I trim them to size and cut them on a diagonal in order to make the corner units of the blocks.  

By this time I am slowly getting into making the strip blocks and the variety of the scraps.  I take a break for lunch, and after sit there evaluating the design board.  I am still not sold on the whole look of the quilt at this point, but I am not ready to abandon the quilt yet.  I tell myself that maybe if I just put the border sashing around the block, it might look better, or at least look more contained.


It did do something to improve the block, but I am still not sure.......  I keep flip flopping back and forth, I don't like it or it's ok.....back and forth.  I stuck with it long enough to complete a row, plus some bits and pieces to do other blocks.


So here it stands.  Now I am really on the fence with this one.  I don't really like it, but I also don't hate it.  I am so indecisive.  I'd hate for this amount of work to go to waste.

I am going to have to cut some more strips if I am to continue, so for now, I am filling the time with other miscellaneous quilty things, like binding.

Sunday 15 April 2018

A bit of this and that

A couple of weekends ago, I got myself organized for a workshop that I am doing, through the Halton Hill Guild.  It's a scrappy quilt, but can also be done with a planned scheme.  I can't quite remember what the pattern is called.  It has the word star in it, but that's all I remember.

I have a collection of Kona solids that I've had in the cupboard for 8-10 years, waiting for me to start making an Ocean Wave quilt, with black for the main squares.  That one still has not materialized.  I started collecting these fabrics through Sew Sister quilt shop as a 4-fat quarter bundle each month.  I don't have every colour, but somewhere along the way I told myself that I had a wide spectrum of colours and that I didn't need anymore, so I cancelled the program.  What you see below are all the colours I had, except for the really light shades of colour and the blacks, greys and browns. 
  

They look pretty nice there on my sewing table, all lined up.  I cut two strips of each 55 fat quarter colours.  What you may not see clearly in the picture is the grey that I plan to use as the background.  If you enlarge the picture, on the right hand side, close to the bottom, you may notice the corner of the grey.  The background is 3 meters of fabric, all cut up into 2 different sizes of squares.

I am looking forward to the workshop and now I am ready to go.  Actually, maybe I should get my Featherweight out and make sure it is running smoothly and that I have all the accessories together.

In the meantime, between working on my AP&Q UFO challenge  and other various things, I am also trying to get all my donation quilts hand binded and ready to go out.  Last Thursday my mom delivered 3 of them for me.


I have another one done and one about halfway done with the binding, so that is what I will be working on today.  Yesturday between eye appointments and household chores, I managed to get another 4 NICU quilts quilted.  I didn't finish until 8:30pm, but they are quilted and ready for the binding.  I think it would be too much to ask, to have these ones binded too, but maybe I can at least try and get the binding prepared.  We'll see......

Enjoy your weekend everyone.  Make the best of it!

Saturday 14 April 2018

Some progress on the Farmer's wife quilt

This is my April's American Patchwork & Quilting UFO challenge quilt.  I was really ready to give up on this one.  I am not too fond of the colours.  I was making this quilt with civil war type fabrics, but I find it too dirty looking.  I mean, all the colours seem to be washed out or maybe tea dyed is a better analogy.

Anyways, I posted it to the Facebook group and many of them were encouraging.  When I start something, I find that I cannot abandon it, as was suggested by some.  So I am taking the suggestion of one of the commenters, which was to move the blocks closer together and make the quilt smaller.

By making the quilt smaller, this meant that I didn't need to make the last 11 blocks.  I am ok with that!  I think just the knowledge that I don't have to make anymore of those blocks, helped me relax a bit more.


I moved the blocks closer together, rearranged them until I had a layout that I was ok with.  The second part of that person's suggestion was to sash them and call it done.  That is an option, but I had an idea in mind that I wanted to try out with this quilt.  I still want to try it.  If I find I am getting overwhelmed again, I may revert back to the suggestion to just sash them and call it done.


This was part of my idea.  I wanted to use the scraps left over from the blocks, to make a type of frame that goes around each block.  I am not too far ahead and there hasn't been much time wasted so far, but I am still thinking whether it is worth the effort to do it this way.  I haven't decided yet.


I may need to do some more to get the feel of it.  To really see how it will look.  

Monday 9 April 2018

My brown bear quilt

The push was on, I was still determined to get this done by the end of the month, of March. I managed to get all the rows done, all the sashing, plus the first two borders.  I couldn't do anymore as I didn't have anything for the last border.

By now I am cutting it down to the wire. The last day of March is Saturday, yay!  My thoughts were that I could still manage to do it.  I just have to wake up and run to the quilt store for when it opens, find my border, take it home, wash it, cut it and attach it.  


Well, here it is.  My finished top.  I did wake up and run to the quilt store for when it opens, find my border, take it home, wash it, cut it and I even attached the three sides, before I was interrupted with other "have to do stuff".  So, in the end, even with my push I didn't quite make it, but.....that weekend I did put the last border on.  Now it sits in line to be quilted.


The last border took me a bit longer to attach, because of these extra pieces in the corner.  I wanted to do something more than just plain borders.  It wasn't too bad though.  Just had to do some calculations and remember to add in the seam allowance before I cut.


Here is a picture of my four legged baby, Maddie.  As I sat there looking at her standing on my quilt, I wondered if she might have been my unconscious inspiration for the orange tone sashing and overall feel of the blocks.  Isn't she pretty?

Sunday 8 April 2018

American Patchwork & Quilting UFO challenge for April

This is my April's quilt for the American Patchwork & Quilting UFO challenge.  This is my Farmer's wife quilt.  It is a sampler quilt from the book called The Farmer's Wife Sampler Quilt.  The book contains samples of 111 different 6" blocks.  

So far I have 24 blocks done with added border around each of them.  I thought I would enjoy making all the various blocks, but I soon found out that I don't enjoy it as much as I thought I would.  I started this quilt in 2012 and did most of what you see here at that time.
  

The blocks were done and there it sat in a state of incompletion.  Eventually I put the blocks away in a time out box.  Some time later, I take them out, thinking I am going to redesign the quilt, so that I can get motivated again.  That's when I came up with the borders to separate the blocks from each other.  I also decided to put them on a diagonal with alternate blocks.  That's why you see them on the wall spread out.

Well........we are now the 8th of April and I feel absolutely no motivation to work on these.  Not even with this challenge.  I wrote as much on the Facebook group for this challenge and got so many suggestions.

Some of the suggestions were to pack them up and give them away to someone who would enjoy doing them, no need to stress over something you do not like anymore.  Others said to drop the design I had in mind and just put the blocks together with sashing and call it done.  There were others who suggested making small things like table toppers, placemats, pot holders, etc.  Just to use them up, practice quilting and call them done.

All good suggestions and there were more.  Everyone putting in their two cents worth.  Everyone trying to help me get my mojo back to complete this quilt, which is my April challenge.

I just don't know what to do.  I feel guilty just getting rid of them and giving them away.  I am a practical girl and wasting is not my thing.  I have been making a lot of small NICU quilts lately and I could use these too, but these colours are so drab, I just can't see covering a baby incubator with them.

So........I leave it on the design wall really hoping that by the end of the month something comes to me.

I will keep you posted.

Saturday 7 April 2018

Finished quilting the forest green squares quilt

It's not much.  It's a simple hunter green squares quilt to give away.  Someone had already made the quilt once, but due to the poor workmanship, I felt I had to remake it, before I could quilt it for charity.  To me, it doesn't matter if the quilt is for friends and family or for charity, I feel for either one we need to put our all into it and do the best work we can.


So here it is done.  It was done just before the New Year, but I still hadn't gotten around to binding it. Now it is bound, labeled and ready to go to someone who will enjoy it and it can possibly provide someone with comfort.

Below is a closer view.  Unfortunately, due to the material colours and the thread colour I used, you can hardly make out the design I quilted.  I can see it better in person.  In the picture you can only really make out some leaves.


I am on a binding binge, trying to get as many of the charity quilts binded, labeled and ready to go out the door.  I am challenging myself to get at least six of them done.  With this one done, I have two completed and four more to go.

Friday 6 April 2018

Progress on my brown bear paws quilt

As some of you may remember the month of March was my brown bear paw quilt, for the American Patchwork & Quilting UFO challenge.  I was at a stand still for a little while, as I was fairly busy with other things.  So the last week of March I am thinking to myself that I am not going to get this quilt done.  That would be two out of three not finished.  Not good odds.

So, I got down to business and finished making all the blocks.  I enjoy making blocks.  They are small bits and pieces that sew up quickly and you can really see the pile growing fast.  After that I figured, let's keep the momentum going and started putting the rows together.  That was last weekend, the Easter long weekend.


While I was taking a break admiring the rows, while sitting and having a tea, I played around with some quilting ideas and thoughts.  I put down a protector sheet and with a dry erase marker and eraser pad I drew a bunch of different options.  Straight lines, curved lines, a mix of both.  Different ideas for different parts of the block.


In the end, I settled for this one.  There will be some ditch work, some ruler work and some free hand work as well.  I am sticking to mostly curves with just a bit of lines in the background of the block.  What do you think?

I haven't gotten as far as figuring out what I want to do on the blue sashing or the borders, but I figure that will come to me when it comes time to quilt it.

Wednesday 4 April 2018

Quilting raindrops on a customer quilt

This is a client's quilt.  It's call a hopscotch quilt.  This is the first time I've heard this name.  Looks like it could be a real scrap user quilt.  I might try and figure out the pattern and use it in the future, as it doesn't look to difficult, but done up in a colour scheme looks good.  In this case my client used multiple blacks and greys with highlights of yellow.  It's very nice.


She decided on the raindrop pantograph which comes from Urban Elementz.  It has soft curves and is gender neutral.  The recipient of this quilt is male.  


Above is a close up of the quilting.  I chose a charcoal/silver coloured thread which helps blend in with most of the fabric colours and shows up a bit more on the borders.  I chose this thread, as I didn't want to distract from the quilt pattern.  The quilting in this case is just there to add some texture to the quilt and not take the spotlight.


Here is the backing.  It is the silver/grey Northcott backing fabric.  The thread is not seen as it blends so well.  I just bought this fabric in a rust colour for my brown bear paw quilt.  Please note the picture above does not do justice to the fabric.  There is more texture than can be seen in the picture.

It turned out nicely.

Tuesday 3 April 2018

Susan's quilt

I belong to the Halton Hill Quilt Guild.  Last meeting we had a round robin.  At our guild, this is where there are four tables set up and each table has a speaker who will teach/demonstrate some sort of quilt technic.  We all sit at one of the tables and in 15 min. intervals we will rotate.

This year there were two tables showing different methods of appliqué, one was the overlay art quilts, and the third was two methods of piecing. 

I thought it went well and I learned a few new tricks and technics.  I completely forgot to take pictures until I got to Susan's table.  Her table was for freezer paper appliqué. 


She demonstrated the way she uses the freezer paper to make the appliqué shapes and showed us some of her pretty finished items.

I was drawn to this quilt in particular.  I really like the mix of appliqué with piecing.  I also like the grid that is created on this quilt with the alternating X block.  Just an FYI, these blocks were only 3" square. So cute!  Maybe I was also drawn to it because of the small sized blocks.  Lol.  Either way, I thought this quilt as a whole looked fabulous!

Monday 2 April 2018

March's BOM from Whirls 'n Swirls are done

Here we are in April and I realized I haven't posted my finished blocks for March's BOM.  This is the 3rd of twelve blocks we are making to learn different techniques for longarm quilting.  There are three different methods/ways to quilt them.  

This first block will be for the modern method of quilting.


This second block will be for the freehand method.


And this last block will be for the traditional way of quilting.


I was going to do the quilting as a quilt-as-you-go method.  When they are all done I was going to put them together into a quilt.  Unfortunately, I've only been able to keep up with making the blocks and haven't had time to load them to my machine to practice stitching them.

I do want to practice them on junk fabric first though too, before I commit the designs to the actual blocks.  I don't fancy messing them up or ripping them out.  I'm a little fickle that way......lol