Thursday, 24 January 2019

Primary easy street block

These next two NICU quilts are 3&4 of 20.  The blocks are the primary block, for Bonnie Hunter's Easy Street mystery quilt, that my daughter made a while ago.  I've gathered up all the orphaned blocks and pieces and I'm on a rampage to use them all up in NICU quilts.


These two were the same block, so I made them similar.  Only changed the last purple border.  

Oh, by the way, did you catch it....another twisted block....lol.  I guess I should have learned from the first one I did yesterday, to take a few minutes to check for errors.  That will teach me...lol.  I've already fixed that twisted block too, so both of these tops are also ready to be quilted.


Now I am working to try to finish the two borders for the remaining two 3-way BOM quilts.  I started putting the grey border on the freehand version of the quilt.  Two more to go.  I will work on the modern version.  Things are definitely coming along.

The one thing that has been at a standstill though, is this month's AP&Q UFO Challenge quilt.  I am hoping that getting these few quick finishes in, will motivate me to relax and sit to do up some more six point stars.  I was initially hoping to at least finish the blocks themselves, but at this rate, I think that idea is just wishful thinking.  We shall see......

Wednesday, 23 January 2019

Alternate Easy Street block

I finished another small NICU quilt top this evening.  This one came about from a leftover, alternate block, from my daughter's version of Bonnie Hunter's Easy Street mystery quilt.

I added the additional pieces around the perimeter of the block, to enlarge the quilt and to use up the rest of the miscellaneous pieces.  I was doing good.  It took me no time at all to get this together, even with all the small pieces of the outer border.


Can you see the problem...........one of these corners is not like the other....lol.  The reason this was one of my daughter's rejected blocks is because she got one of the squares turned the wrong way, so instead of fix it, she just put it aside.  In the end she didn't need it, due to her changing the layout, from the original designed by Bonnie.  I didn't even catch the error, until I had the whole thing pieces and the final border on.

How frustrating.......... Oh, well.  There was no helping it.  I had to fix it.  It is just not in me to leave it like that.  So today after work, I took the time to gently remove the one block, while keeping the rest as is.  I turned it and sewed each side carefully, not to catch fabric from the other blocks.  Ironed it up, and voila. Done!  

However, you'll have to wait for the revised, fixed version when I quilt it.   I have a customer quilt to get done this weekend, install the wall mounted tv and set up the entertainment area.  Maybe after that, if there is time, I can get all three NICU quilts quilted.

Stay tuned for the reveal of the other two, tomorrow.

Tuesday, 22 January 2019

Finished quilting a NICU blue rail fence quilt

I have a small finish for January, so far.  This is 1 of 20 NICU quilts, that are being made up from miscellaneous blocks and pieces.  Mostly from extra blocks from other finished quilts, from customers, friends, family and myself.  This one is a rail fence block set in the traditional basket weave layout.  The blocks were already assembled, so all I had to do was put the blocks together.


I found this piece of tie dye fabric in my stash.  It has the same tone of blues that are on the front, but it also has some splashes of colour to brighten it up.


In my attempt to brighten up the quilt a bit further, I quilted this piece with the Becker's Star pantograph, using a bright mango yellow thread.  The design may be a bit difficult to see in the picture, due to the busy fabrics, but in person it stands out more.


Today after work a took half an hour before starting dinner to organize the next few NICU quilts I want to do.  Those are all curtesy of my daughter.  They come from the extra blocks of her Easy Street quilt.  I'll post more about them as I finish them.  

Monday, 21 January 2019

Mom's indigo swirl quilt

Saturday and Sunday were very busy for me with renovations.  I am so grateful for how far they've come with technology, when it comes to paint.  Paint now a days dries for recoat in 1-2 hrs depending.  I was able to finish the plastering late afternoon on Saturday, prime the ceilings and walls, paint the ceiling two coats plus the walls, in my downstairs hallway and my sewing room.  I would never have been able to get that much done in one day before.

Sunday it took me most of the morning and part of the afternoon to put my sewing room back together.  After that I painted the downstairs hallway the last coat and decided to freshen up the paint in the kitchen too, as the hallway and kitchen are joint by some walls.  Wow!  Three rooms in one weekend and all cleaned up again, before heading to bed that night.  All because I didn't have to wait the usual 4 hour drying time.

Anyways, now on to the quilting part of this post.  As I did all the painting this weekend, there was no quilting for me, so I found one of my older post that I haven't posted yet.

This is my Mom's quilt.  She got the pattern from a quilting magazine.  She fell in love with this quilt the minute she saw it and had to make it.  

  
The quilt picture was taken at her place, on the couch in the livingroom where it will be.  It matches very well with her carpet....lol.  We took the inspiration from a pillow that matches her armchair.  I took this picture at her house, because I forgot to take the finished quilt while I had it.


She gave me the quilt to quilt for her and I finished it back in the beginning of August. It took me a while to get the final picture.  Above is a close up of her quilt.  You can see the colours better.  Mainly in blues, a few kaki and beige for the background.


Here is a close up of the quilting, just off the longarm.  I love the romance of the curves to these block and how one block leads right into the other.  Mom had to put this on her design wall in order to keep the colours straight, as each block has a colour fabric from it's neighbour.  

It's beautiful!  I may make one for myself in another colour way.  But.....curves....I seem to remember how long it took me to finish my drunkard's path quilt, all because it had curves.  We'll see.  Maybe, maybe not.

Sunday, 20 January 2019

The traditional version of the 3-way BOM top is complete

I realized I forgot to post this one, when I was writing up the last post about finishing the last two blocks for the freehand version of the 3-way BOM.  I not only finished these blocks back in November, but I also finished assembling the complete top.

Here is the first block.  Of all the blocks, this is probably my least favourite.  I wonder how this block will be quilted.  The quilting may completely change the look of the block.


Here is the second block,  the last of twelve blocks.  I like the large open space of the corner triangles.  I can't wait to see what will be quilted in that section.


Finally we have the completed top.  If you recall from the beginning, when I started this venture, back in January, I decided I was going to do all three versions of this quilt.  I wanted to learn all the different quilting designs being taught, for all three versions.  

My stipulation/restriction, was that the only way that I could justify doing all three, was that I had to use my stash.  No buying any fabric for these.  I didn't want to put any more cost into this longarm quilting class.  I did find all the fabric for all three versions, for the blocks.


When it came to the sashing and borders.....well.....I hadn't thought that far in advance.  I still didn't want to buy fabric for the sashings or the borders.  That is why the border is a bit unusual.  I only had these two fabrics that would coordinate with the quilt top.  The thing was though, I didn't have a big enough piece to use the darker red, which was my first chose.  So in the end I decided to piece the border.  Even doing that, I barely had enough.  Probably because I needed a bit more fabric, when I decided to do the diagonal seams, to slip in the rose colour fabrics.

The insertion of the diagonal piece tends to make the border look a bit more modern than traditional, but.....oh well, done is better than not.

Now I am going to practice some of the new to me, quilting designs and get this sampler quilt done.  The quilt will be a donation to Project Linus when I am done.

Saturday, 19 January 2019

Freehand version of the 3-way BOM quilt

Yesterday, throughout the day, during my breaks and lunch, I finished assembling the last two blocks of the freehand version of the 3-way BOM quilt.  They didn't take long, because I had already made the same blocks for the traditional version.  Which reminds me, I don't think I showed the completed top for the traditional version.  I'll have to look for those pictures to post about it.


These are the two last blocks.  I like when there are pieces large enough to display a butterfly, like in the block below.  As it so happened, I did not have to fussy cut this one.  I just lucked out when I cut a piece of the edge off the fabric.  These colours are so close in shade, that sometimes you can't tell where one starts and the other one ends.  I think I prefer having more of a distinction.


It was going so well, that at the end of my shift, I decided to go ahead and put the rows together with the sashing.  Yay!!!  The centre of my top is done.  To complete this quilt top, I will use the grey sashing fabric to make the first border and follow that up with the butterfly fabric.


I'm almost done this one.  Soon I will be able to practice live, the freehand quilting with the freehand version, versus just drawing them out.  I know that drawing them out is important, as it creates muscle memory, but I am just itching to do it for real.

Today will be mainly plastering, sanding, plastering, and sanding some more.  I am hoping to prime by the end of the day and maybe even a coat of paint.  If I get really close, I will stay up late into the night/morning, just so that I can finally get my quilting room back in order.

Wish me luck!

Friday, 18 January 2019

Take a Stitch Tuesday (TAST) week 3 for 2019

Take a stitch Tuesday for me is late this week, but I am getting caught up before the next stitch is revealed.  That's something.  This week is another common and versatile stitch. I made a few different versions for this one.

Here is the link for week three of TAST and Beyond TAST:  https://pintangle.com/2019/01/15/tast-week-3/

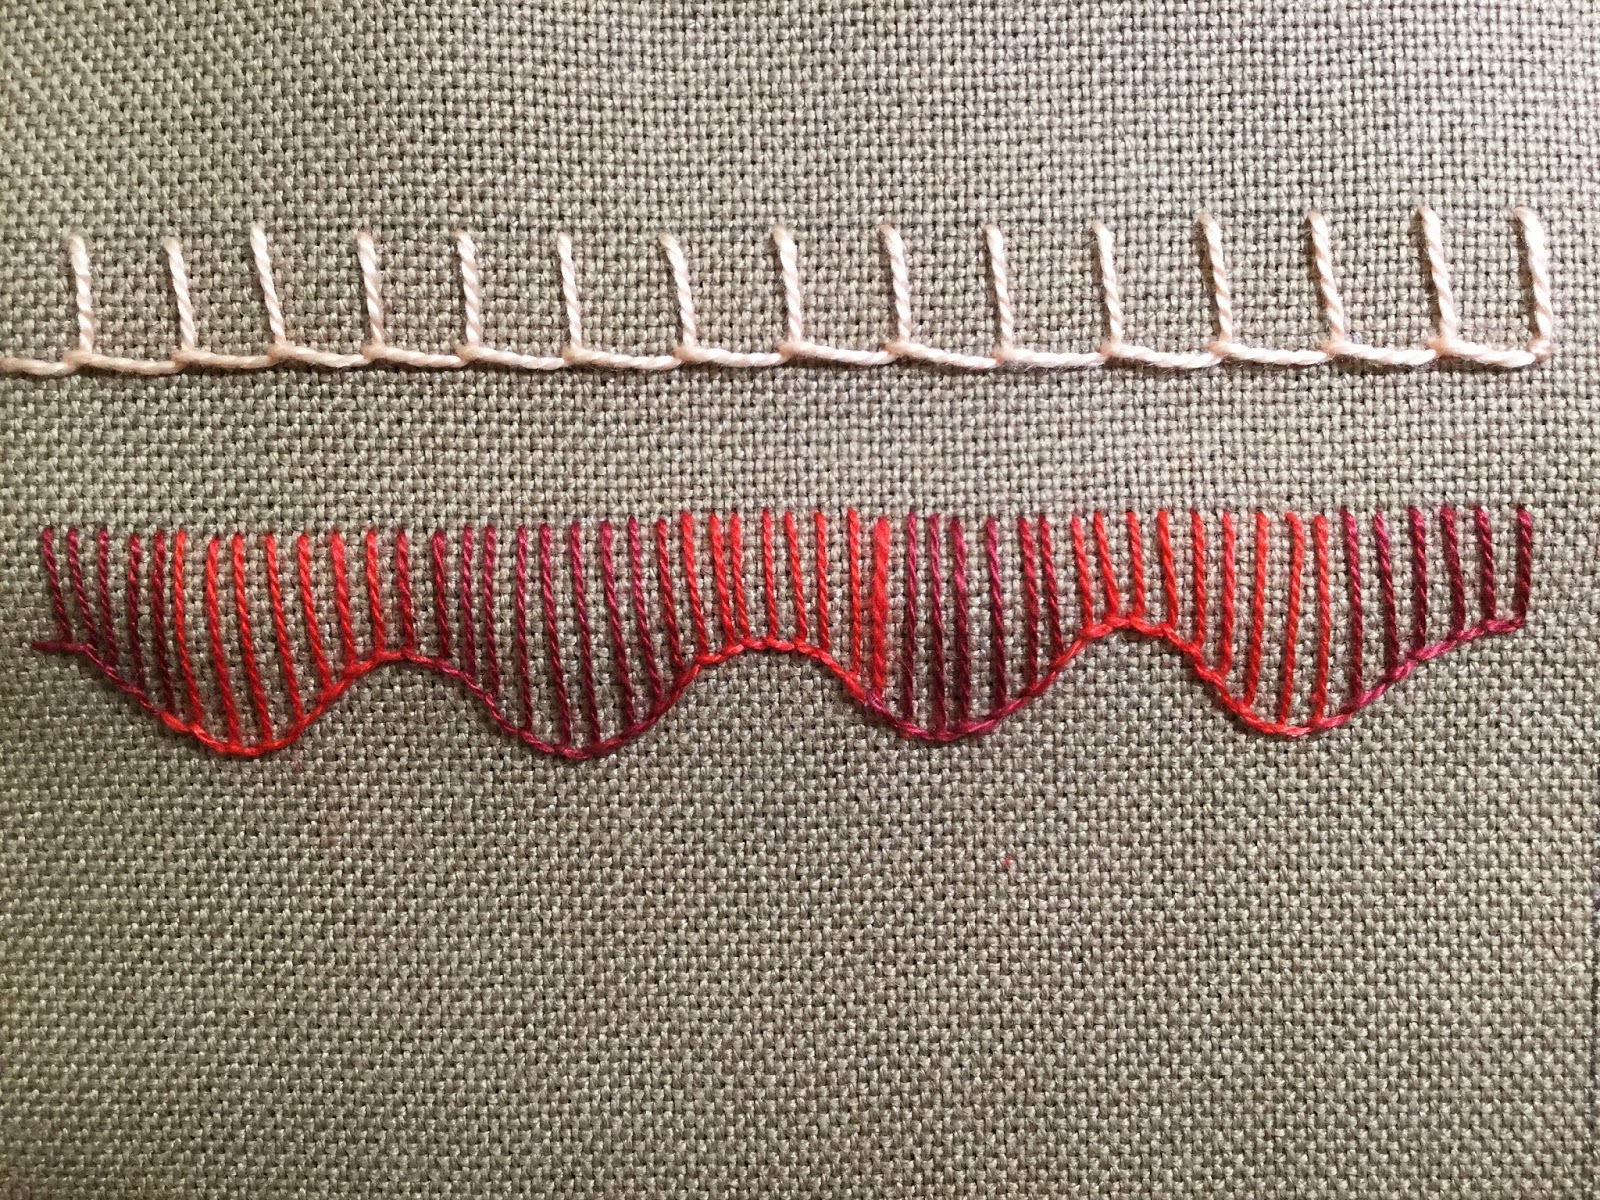
The stitch for week 3 of TAST is the Buttonhole Stitch https://pintangle.com/2012/01/09/take-a-stitch-tuesday-week-2-2/, my version is the first row with peach/pink stitches in the picture below.  I did the traditional version.  There are many uses for the buttonhole stitch, but most commonly you would see them along the edges of an appliqué or the edge of a blanket.  


Just below the peach/pink traditional buttonhole stitch, I tried a fancier version.  Sharon shares many different ways to use this stitch.  Go check it out on her site.  Myself I decided to do the one where the stitches are tighter together and the bottom edge forms a scalloped edge.  That is the one I did above using the variegated red thread.

I was having so much fun that I decided to do another variation from Sharon's selection.  This next one, the one using brown thread, is in fact two separate rows placed back to back.  I can see this done with beads between or on the tips of the short and long stitches.  It looks good, but I just noticed that I will need to work on how to get both sides to match up.  There were many other variations, so don't forget to check them out.


The stitch for week 3 of Beyond TAST is the Reverse Buttonhole Bar https://pintangle.com/2013/12/17/take-a-stitch-tuesday-94-reversed-buttonhole-bar/, my first version below, is purple with the additional part done in pink.  This stitch is another variation of the buttonhole stitch above, only it is a little bit thicker at the base.   You can do it decoratively, with different coloured threads, like I did, or using the same coloured thread.  You could even do the second part with a ribbon, if you wanted to get fancier.


This last sample, the bottom row, was from a link, that someone commented on Sharon's blog and shares what she did with the buttonhole stitch.  This person was the only one I saw so far, that incorporated beads within the stitch.  Check it out here, from Queenie - http://fat-quarter.blogspot.nl/2013/12/reversed-buttonhole-bar.html/.  My version above was done with a dark salmon coloured thread and Mother-of-Pearl pink beads.  In this example, all the parts, bars and second level of stitches were done with the same salmon colour.

Basically, this stitch has the first layer, the buttonhole stitch, the second layer the "reverse buttonhole" and you repeat two layers of the reverse buttonhole stitch on the other side of the beads.  It does stand out a bit more than just the simple traditional version of the buttonhole stitch.  Queenie's version looks a bit more substantial.  Maybe she used shorter bars so that the second layer of stitches lay closer together?  I'm not sure.  I will have to play with this one and see if I can duplicate her technic.

Have a great weekend everyone!